How To Set Up An Email Campaign.
Create and send custom email messages to the segmented contact lists in your ChatSupport account at a scheduled time. Recipients can respond to you by clicking the reply button in the email.
Choose Campaign Type.
1. Go to Campaigns.

2. Click New Campaign.

3. Choose Emails, then click Next.

Design Email Campaign.
You can always preview the final look of your campaign on your screen, even as you design it.
1. Set a Campaign Name.

2. Enter a Subject Line for your email campaign.

3. Select a FROM name.

4.Click the +Add Content button under Campaign Content and type in your content.

5.Click Next.

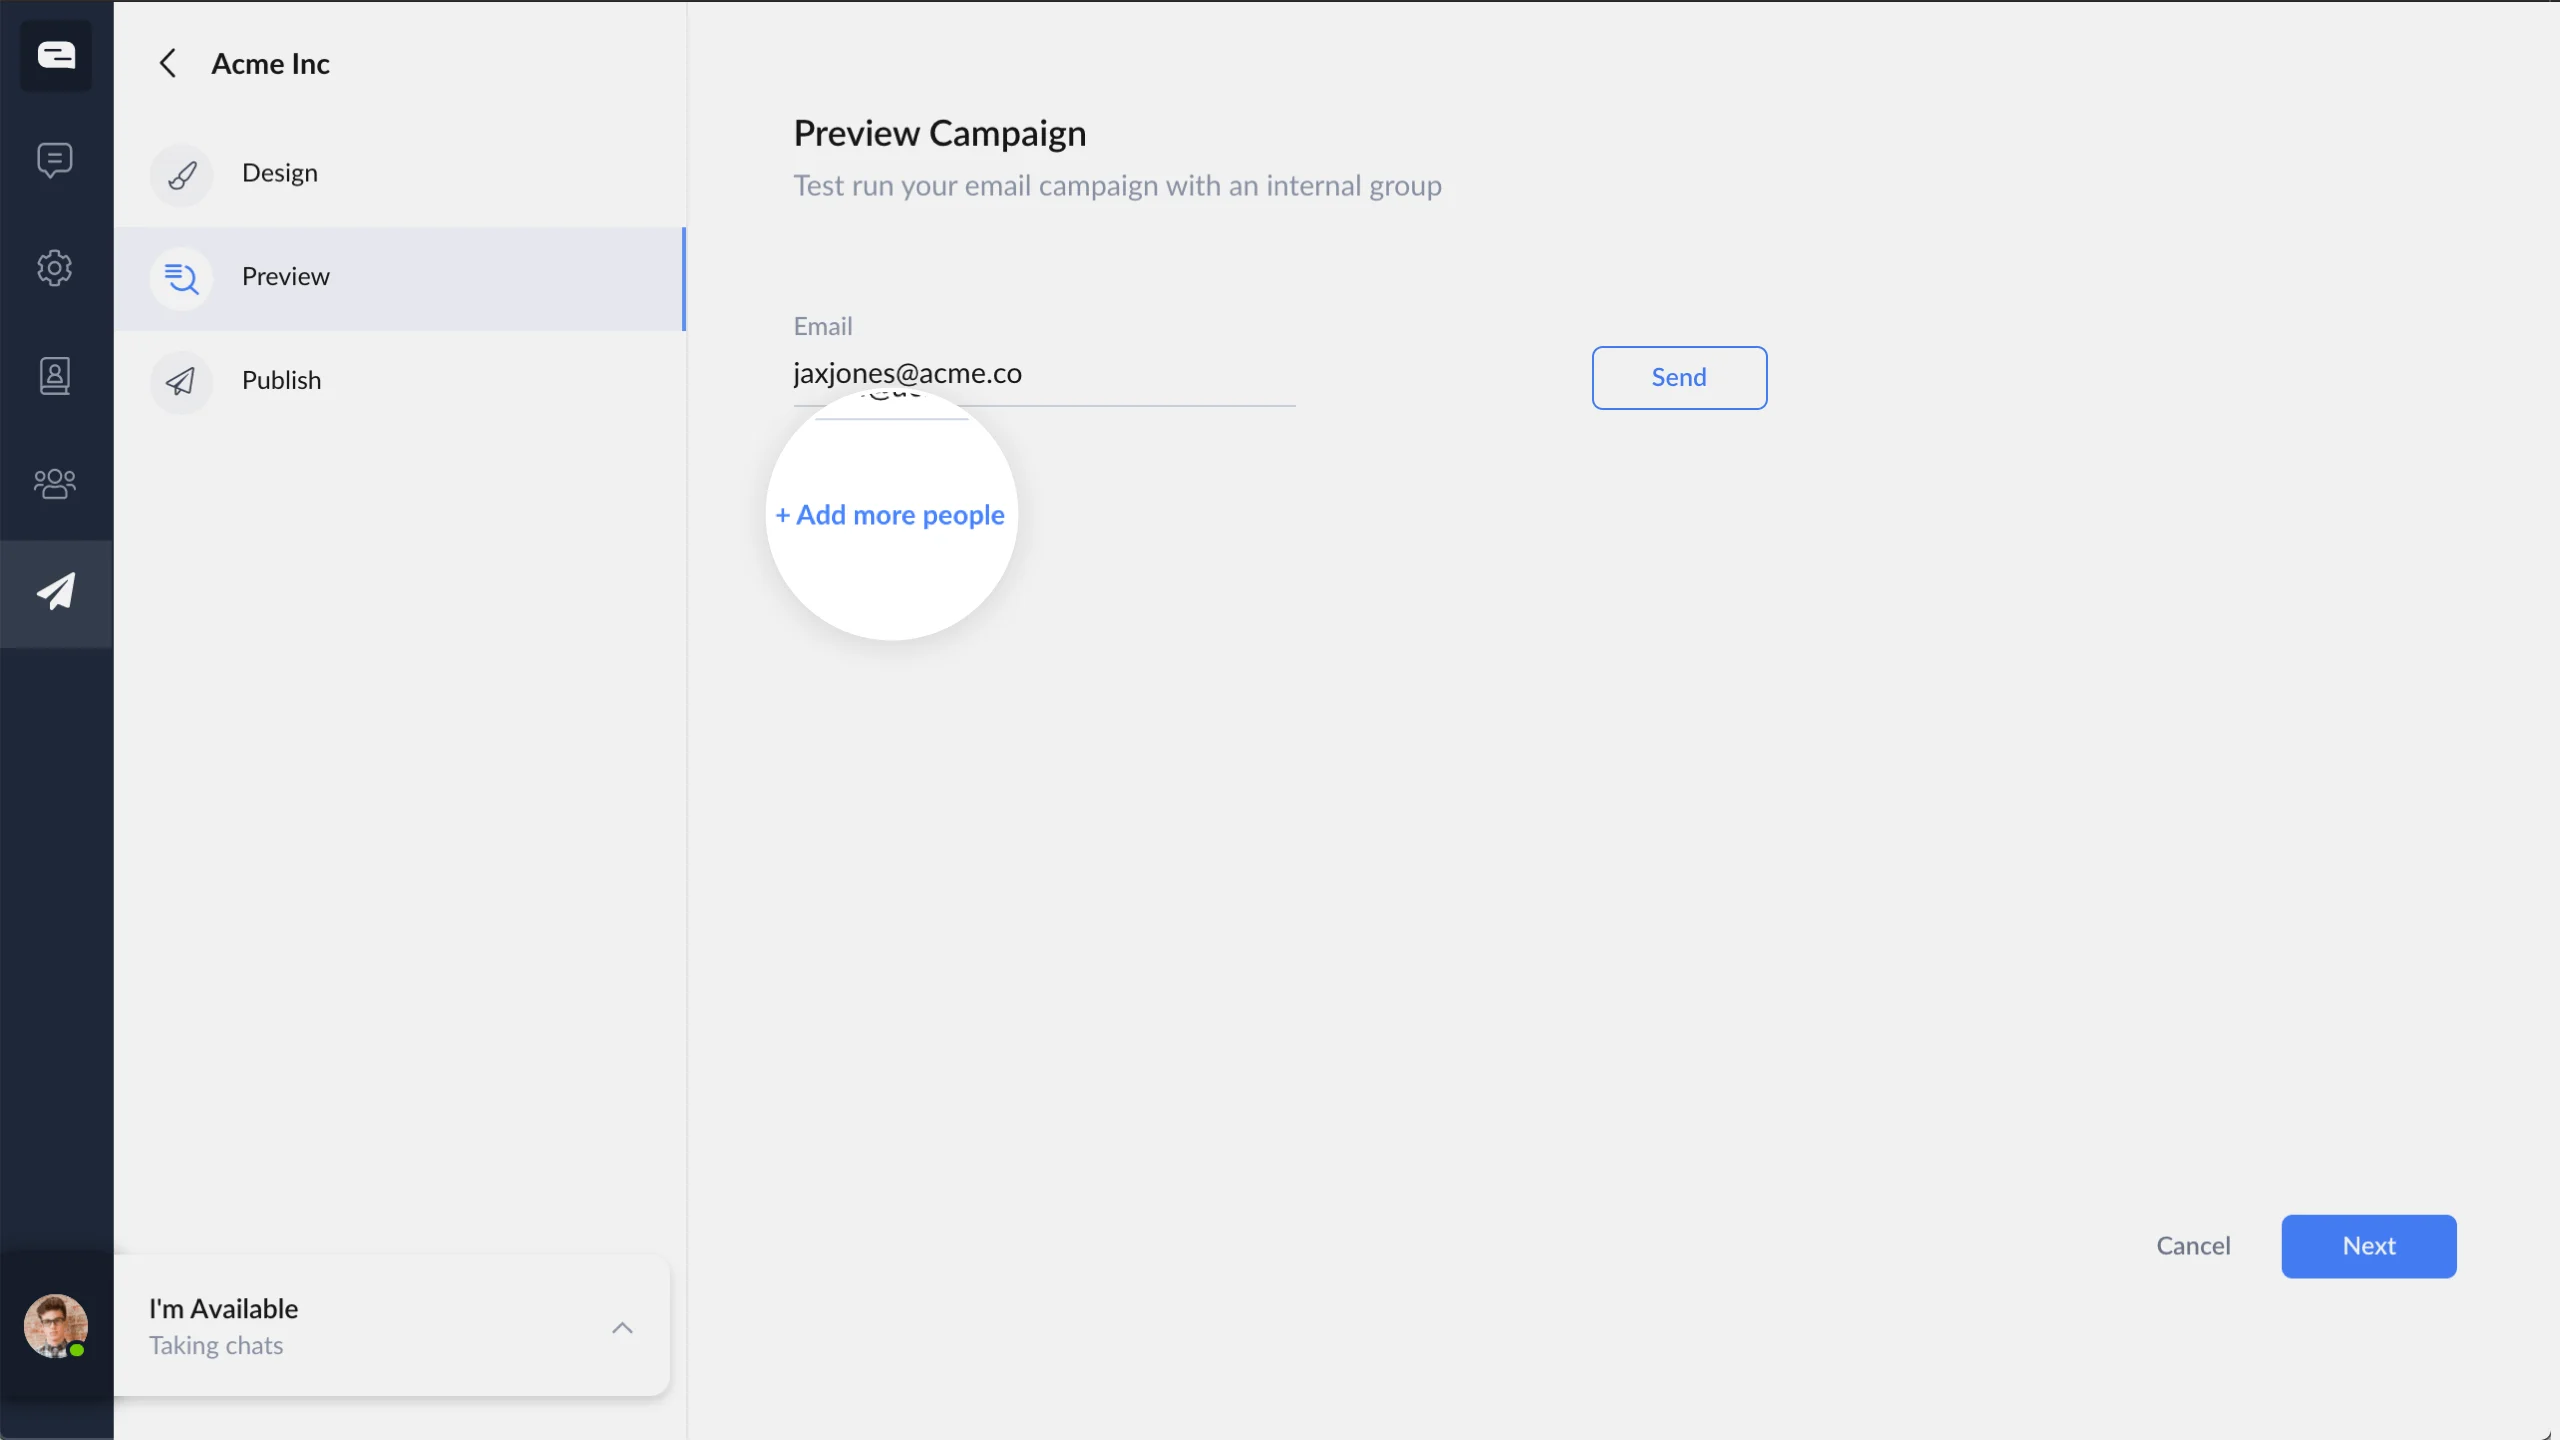
Preview Email Campaign.
1. Type an email address in the Email field to preview and test your email campaign.

2. Click the +Add more people button to add multiple recipients.

3. Click Send.

Then click Next.
Publish Email Campaign.
Choose the recipient contact segments.
1. Click the drop-down menu and click on one or more segments to select.

2. Set a start and an end date for the campaign.

3. Click Publish.

The email campaign is now live.
No
|
Yes